Hi there! Are you ready to fill your kitchen with the scent of a Sri Lankan bakery? If you’ve ever walked past a local bakery in Colombo, you know that irresistible smell of fresh bread and caramelized sugar. Today, we’re tackling a true icon: the Kimbula Banis.
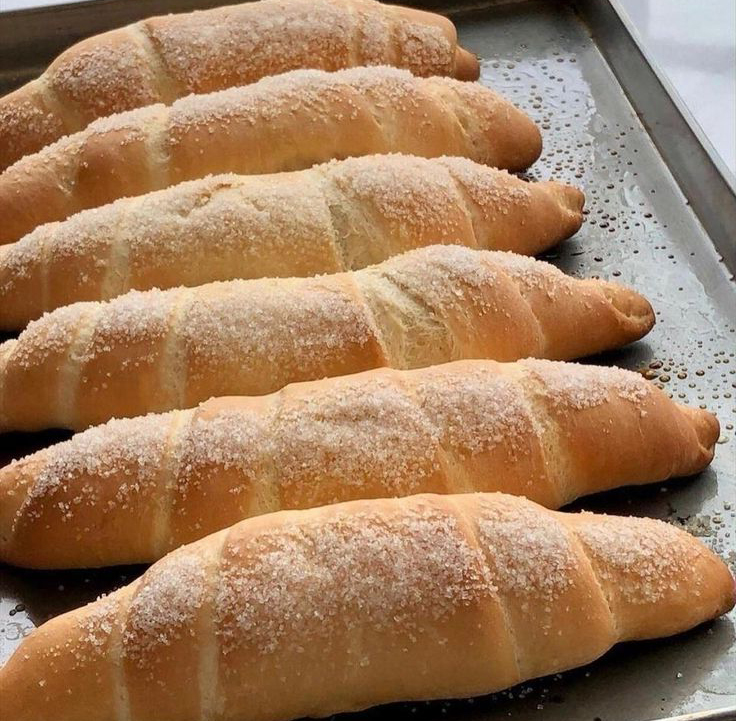
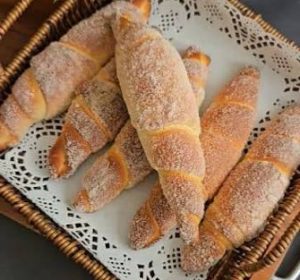
Known affectionately as “Crocodile Buns” (because of their tapered, scaly look), these aren’t just your average rolls. They are soft, slightly chewy Vienna-style buns coated in a crunchy layer of sugar. They are the ultimate “short-eat” companion to a hot cup of Ceylon tea. Whether you’re a pro baker or a total newbie, I’m here to guide you through making these treats at home.
Grab your apron, and let’s get baking! (Don’t worry, no actual crocodiles were harmed in the making of this recipe).
What Exactly Is a Kimbula Banis?
Before we dive into the flour and yeast, let’s talk about what makes this bun so special. In Sri Lanka, “Kimbula” means crocodile. These buns get their name from their long, tapered shape that looks a bit like a snout and a tail.
Unlike a typical dinner roll, the Kimbula Banis has a denser, more satisfying crumb. It’s slightly sweet on the inside, but the real star is the sugar coating on the outside. During baking, that sugar melts just enough to stick, creating a wonderful crunch that contrasts perfectly with the soft bread. It’s a staple of Sri Lankan tea culture, and once you try one warm from the oven, you’ll understand why!
The Essentials: Sri Lankan Ingredients You’ll Need
To get that authentic bakery texture, you need the right building blocks. Quality matters, so make sure your yeast is fresh and your flour is high-grade.

Here is your shopping list. You can find these essentials right over at srilankastores.com:
- All-purpose flour: 500g (about 4 cups). This provides the structure.
- Instant dry yeast: 8g (roughly 2 ¼ tsp). This is what makes your buns fluffy and light.
- Sugar: 60g for the dough, plus plenty extra for the coating. (The more sugar, the better, right?)
- Milk powder: 30g. This is a classic Sri Lankan bakery secret for a richer flavor and softer crumb.
- Butter: 50g, softened. It adds that lovely richness.
- Salt: 1 ½ tsp. To balance the sweetness.
- Warm Water/Milk: Around 280-300ml. You want it warm to the touch (like a baby’s bathwater), not boiling!
Step-by-Step: Bringing the Crocodile to Life
Let’s break this down into easy, manageable steps. Put on some music, clear your counter, and let’s create some magic.
1. Wake Up the Yeast
First things first: we need to make sure our yeast is alive and kicking. In a small bowl, mix your yeast with 1 tablespoon of the sugar and a few tablespoons of your warm milk/water. Give it a gentle stir and let it sit for about 10–15 minutes.
Pro Tip: If the mixture doesn’t get foamy or bubbly, your yeast might be “sleeping” (okay, it’s dead). Don’t use it! Start over with a fresh packet to avoid heavy, flat buns.
2. Mix and Knead the Dough
In a large bowl, whisk together your flour, remaining sugar, salt, and milk powder. Create a well in the center and pour in your bubbly yeast mixture along with the rest of the warm liquid.
Mix it until a shaggy dough forms. Now, add your softened butter. This is the fun part: time to knead!
- By Hand: Knead for about 10 minutes on a lightly floured surface. You’re looking for a smooth, elastic dough that bounces back when poked.
- By Mixer: Use a dough hook on medium-low for about 5–7 minutes.
The dough should be soft and just a tiny bit tacky, but it shouldn’t stick to your fingers like glue. If it’s too sticky, add a sprinkle of flour.
3. The First Proof (The Big Sleep)
Shape your dough into a smooth ball and place it in a lightly greased bowl. Cover it with a damp cloth or plastic wrap. Place it in a warm, draft-free spot.
Wait about 60 minutes, or until the dough has doubled in size. This is a great time to enjoy a quick cup of tea yourself!
4. Divide and Relax
Gently punch down the risen dough to release the air. Turn it out onto your counter and divide it into 8 equal portions. Roll each piece into a smooth ball.
Cover them and let them rest for another 15 minutes. This “relaxing” phase is crucial: it makes the dough much easier to shape later without it snapping back like a rubber band.
5. Shaping the “Crocodile”
Now for the signature look! Take a dough ball and roll it into a long, thin triangle (think of an elongated pizza slice).
Starting from the wide base of the triangle, roll it up toward the pointy tip. As you roll, gently stretch the dough to make it longer. The result should be a tapered log that is thick in the middle and thin at the ends. Pinch the “tail” (the pointy tip) firmly so it stays put.
6. The Second Proof
Place your shaped “crocodiles” on a baking tray lined with parchment paper. Make sure to leave plenty of space between them: they like to expand! Cover them lightly and let them rise for another 30–45 minutes until they look puffy and proud.
7. The Sugar Shower
Preheat your oven to 180°C (350°F). Before the buns go in, we need that iconic sugar coating.
- Method A: Brush the tops lightly with water or a thin sugar syrup (water + sugar boiled together).
- Method B: Sprinkle a generous amount of granulated sugar over the damp tops. Press it in very lightly so it sticks.
8. Baking to Perfection
Slide the tray into the oven. Bake for 20–25 minutes. Keep an eye on them: you want a beautiful golden-brown color. The sugar should be slightly glistening but not burnt.
Once they’re out, the hardest part begins: waiting for them to cool down just enough so you don’t burn your tongue!
Troubleshooting: Common Bun Blunders
Even the best bakers have “oops” moments. Here’s how to fix common issues:
- My buns are hard and dry: You might have added too much flour or overbaked them. Next time, keep the dough a bit more moist and check the oven 5 minutes early.
- They didn’t rise: Your yeast was likely old, or your liquid was too hot and killed it. Always “proof” your yeast first to be sure!
- The sugar fell off: Make sure the dough surface is damp before you sprinkle the sugar. Using a light sugar syrup brush-on works wonders for stickiness.
- They look like blobs, not crocodiles: Shaping takes practice! Make sure your triangle is long and thin. The more “rolls” you get, the better the shape.
Serving Suggestions: The Full Experience
Kimbula Banis are best enjoyed fresh. In Sri Lanka, we usually serve them with a steaming cup of Sri Lankan Tea with Milk.
You can slice them down the middle and spread a little extra butter if you’re feeling indulgent. They also make a fantastic breakfast on the go or a sweet treat for your kids’ lunchboxes. (Trust me, they’ll be the envy of the playground).
Watch and Learn: How to Make Kimbula Banis
Sometimes seeing the technique in action makes all the difference. Check out this fantastic video by MACHO to see exactly how to master that crocodile shape:
Shop the Ingredients
Ready to start your baking adventure? We’ve got everything you need to recreate the authentic flavors of Sri Lanka right in your own kitchen. Visit our shop to find the best quality ingredients:
- Explore our Grocery Selection for flour, yeast, and sugars.
- Discover Traditional Spices to add that extra kick to your kitchen.
- Premium Coconut Products for all your Sri Lankan cooking needs.
Have fun baking your very own Kimbula Banis! Don’t forget to share your photos with us( we love seeing your kitchen creations.) Happy eating!