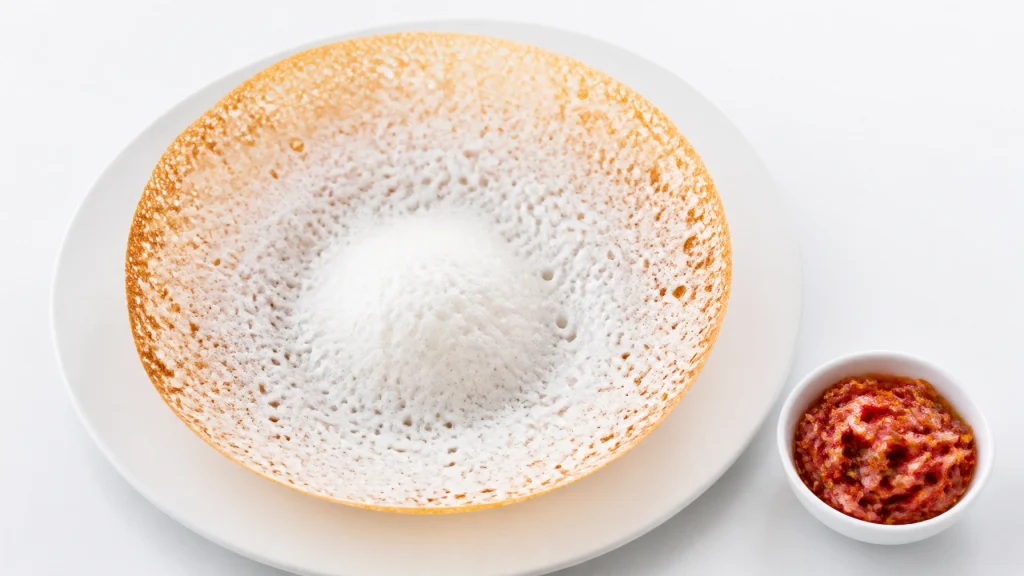
Hi there! Have you ever looked at a Sri Lankan hopper and thought, “There is absolutely no way I can make that at home”? (We’ve all been there, trust me!) That iconic bowl-shaped crepe, with its lacy, golden-crisp edges and that soft, pillowy, cloud-like center, looks like a work of art that only a seasoned pro could master.
But here’s a little secret: it’s actually incredibly easy.
If you have five minutes to spare for prep, you can master this Sri Lankan hopper recipe. Yes, you heard that right! While the batter needs a little “nap” (fermentation) to get those famous bubbles, the actual work on your part is shorter than a commercial break.
At Sri Lanka Stores, we’re all about bringing those authentic island flavors into your kitchen without the stress. So, grab your apron, and let’s dive into the world of Appa (that’s the local name for hoppers!).
What Exactly is a Hopper?
Before we get our hands messy, let’s talk about what we’re making. A hopper is a fermented rice flour and coconut milk pancake. It’s cooked in a small, deep, rounded pan called a thachchiya. Because of the pan’s shape, the batter naturally pools in the bottom to create a soft “bread” center, while the sides stay thin and crunchy.
It’s basically the cool, tropical cousin of the French crepe. (Only better, because… coconut milk!)
Your 5-Minute Ingredient Checklist
To keep things simple, we’re using a beginner-friendly version of the sri lankan hopper recipe that uses instant yeast. Traditional recipes sometimes use toddy (palm wine), but unless you have a palm tree and a climber in your backyard, yeast is your best friend!

- 2 cups Rice Flour: Make sure it’s fine white rice flour.
- 1 ½ cups Coconut Milk: Go for the full-fat canned stuff for that rich flavor.
- 1 tsp Instant Yeast: This is what gives us those beautiful air bubbles.
- 1-2 tsp Sugar: To feed the yeast and help with browning.
- ½ tsp Salt: To balance the sweetness of the coconut.
- 1 cup Water (or Coconut Water): To get that perfect, pourable consistency.
The Equipment: Do You Need a Special Pan?
Ideally, yes. You want a non-stick hopper pan. They are small, curved, and usually come with a lid. If you don’t have one yet, don’t panic! You can use a small, deep non-stick frying pan. Your hoppers will be flatter, but they will still taste like a dream. (And let’s be honest, the taste is what matters most!)
Step 1: The 5-Minute Batter Prep
This is the “active” part where you do all the work. It’s so fast you won’t even have time to finish a cup of Ceylon Tea.
- Whisk the Dry Stuff: In a large bowl, toss in your rice flour, yeast, sugar, and salt. Give it a quick stir.
- Add the Liquid Gold: Pour in your coconut milk and about half a cup of water.
- Whisk until Smooth: Use a whisk (or even a blender if you’re feeling lazy, we won’t tell!) to get rid of any lumps.
- Adjust the Consistency: You want a batter that is thinner than a pancake mix but thicker than water. It should flow easily off a spoon. If it feels heavy, add a splash more water.
Penny’s Pro Tip: If you want that extra “tang” that authentic hoppers are known for, use coconut water instead of regular water!
Step 2: The Beauty Sleep (Fermentation)
Cover your bowl with a damp cloth or plastic wrap. Now, leave it alone!
- Quick Version: Let it sit at room temperature for 2 to 3 hours. You’ll see little bubbles forming on the surface. That’s the yeast doing its magic!
- Pro Version: If you have the patience, let it sit for 6 hours or overnight in the fridge. The flavor becomes deeper and more complex.
Step 3: The “Swirl” (The Fun Part!)
Once your batter is bubbly and smells slightly sweet and yeasty, it’s showtime. This is where you become a hopper artist.

- Heat the Pan: Get your hopper pan on medium-high heat. You’ll know it’s ready when a drop of water sizzles and disappears instantly.
- The Ladle Drop: Pour about ¼ cup of batter right into the center of the pan.
- The Swirl: Immediately pick up the pan by its handles and give it a quick, confident swirl. You want the batter to coat the sides all the way to the top.
- The Cover: Put the lid on. This is crucial! The steam cooks the soft center while the dry heat crisps the edges.
- The Wait: Let it cook for about 2–3 minutes. Don’t keep peeking! (Okay, maybe peek once.)
When the edges turn golden brown and start to pull away from the sides of the pan, your hopper is ready. Slide it out gently. It should be shaped like a perfect little bowl.
Step 4: Level Up with an Egg Hopper
Want to impress your brunch guests? Make a Bitarra Appa (Egg Hopper). It’s the ultimate Sri Lankan comfort food.

How to do it:
After you do “The Swirl” in Step 3, crack a fresh egg right into the center of the batter. Sprinkle a little salt and black pepper over the yolk. Cover it back up and cook for an extra minute until the egg white is set but the yolk is still a bit runny.
Pure. Magic.
What to Serve with Your Hoppers
Hoppers are rarely eaten alone. They love company! To have the full Sri Lankan experience, try these pairings:
- Lunu Miris: A spicy sambol made with red onions, chili flakes, lime, and Maldive fish. It’s the “pop” of heat every hopper needs.
- Seeni Sambol: Caramelized onions with a sweet and spicy kick.
- Pol Sambol: A fresh coconut relish that is basically the soul of Sri Lankan cuisine.
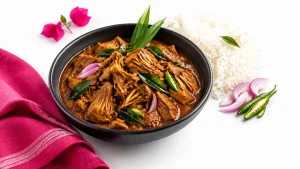
- Chicken or Fish Curry: Pour a little gravy right into the center of the hopper and let the “bread” soak it all up.
Troubleshooting Your Hoppers
Is your first hopper looking a bit… sad? Don’t worry! Even the pros mess up the first one. It’s like the first pancake: it’s the sacrificial lamb for the pan.
- It’s Sticking! Your pan might not be hot enough, or it might need a tiny drop of oil wiped on with a paper towel.
- The Center is Raw: Lower the heat slightly and keep the lid on longer. The steam needs time to work!
- The Edges aren’t Crispy: Your batter might be a bit too thick. Whisk in a tablespoon of water and try again.
- No Bubbles? Check your yeast. If it didn’t foam up or bubble during the rest period, it might be expired. (Check the date on the packet!)
Ready to Watch a Pro?
If you’re a visual learner (we totally get it!), we highly recommend checking out this fantastic tutorial by Chulie’s Kitchen. She breaks down the batter consistency and the swirling technique perfectly.
(Search for “RASA RAHASA” on YouTube for the best beginner guide!)
Final Thoughts
Making a sri lankan hopper recipe doesn’t have to be a daunting task. With just 5 minutes of prep and a little bit of patience, you can bring the streets of Colombo right into your own dining room.
So, what are you waiting for? Go get that rice flour and start swirling! We can’t wait to see your crispy creations. If you try this, tag us or leave a comment below. We’d love to hear how your first “Appa” turned out!
Have fun cooking!